


How to Prepare for the Roof Replacement Process

You don’t need to stay home for the entire roof replacement. To understand what to expect during the roof replacement process, plan to be available when work begins and for the final walkthrough. Installation typically takes one to three days on site, while the full process, from inspection to walkthrough, spans several weeks.
It’s understandable to wonder how disruptive the work will be. Roof removal and installation can be noisy, and debris may include sharp nails. Before work starts, move cars away from the driveway and take fragile items down from walls or shelves.
This guide covers preparation, tear-off, installation, and cleanup, along with the main budget categories: roofing materials, labor, and any roof-deck repairs uncovered during removal. You’ll also learn what can affect the schedule, helping you plan for your household and feel prepared from the first day of work through the final walkthrough.
Table of Contents
Should I Stay Home During Roof Replacement?
Permit requirements and applicable building codes depend on local requirements; local government offices may keep building permits with roof-replacement details. Include the permit question in pre-installation planning, alongside the roof inspection and estimate.
Be available at the start, then plan your day. You don’t need to stay home for the entire installation, but being present when work begins helps you discuss access and the work area. Roofing can be noisy, so plan calls, rest, or errands around the crew’s arrival.
Prepare the interior and driveway. Roofing work can cause light vibrations inside, so move fragile items from walls and shelves before installation. Move cars out of the driveway to reduce the risk of damage from falling debris, including nails and other sharp materials.
Use the roof inspection and estimate to clarify the scope. An inspection and estimate typically take 1 to 2 hours. The assessment helps establish the roof’s condition and replacement needs; discuss material, color, and warranty options as part of planning.
Expect the roof deck to be checked during tear-off. The roof deck is the wood beneath the roofing that supports the new system. Once old materials are removed, the crew can identify rot or other damage. Damaged decking may need repair or replacement before new roofing goes on.
Attend the final structural inspection. Before considering the work complete, review the roof’s structure with the crew. Ask them to show you any repaired roof-deck areas and explain how the finished system covers those sections.
Walk through the finished appearance and cleanup. Review visible details, including the roof edges and starter shingles, then look over the property for debris. A final walkthrough lets you discuss the finish and review the warranty documents for the materials and work performed.
How Long Does it Take to Install a Roof?
A residential roof replacement typically takes one to three days on site; the full process, from inspection through final walkthrough, spans several weeks. When choosing a roofing contractor in San Diego, verify licensing and insurance, review a written estimate, and avoid high-pressure demands or unclear work terms.
Prepare the Decking and Install Underlayment
Review the work plan for how the crew will prepare the decking before covering it. The roof deck must provide a sound base for the new roofing; damaged areas need attention before installation continues. Underlayment creates a barrier against water and ice. Ask for a clear explanation of any proposed deck repairs and how the underlayment will cover the prepared surface.
Install Shingles and Ridge Caps
Look over the material and venting plan before shingles are installed. Shingle placement follows a staggered pattern, with an offset of ½ of a shingle tab below and ½ of a shingle width. For a ridge vent, roofers cut a 2-inch gap along the peak before fitting the vent. Ridge caps then cover the peak, finishing the roof’s highest seam.
Material affects the schedule. Asphalt shingles are lighter than tile, which can make tear-off and installation quicker; heavier tile can take longer to handle and fit. Roof size, steep slopes, chimneys, skylights, and multiple existing layers also add work. A larger crew provides more manpower, but the roof’s layout and material remain important factors.
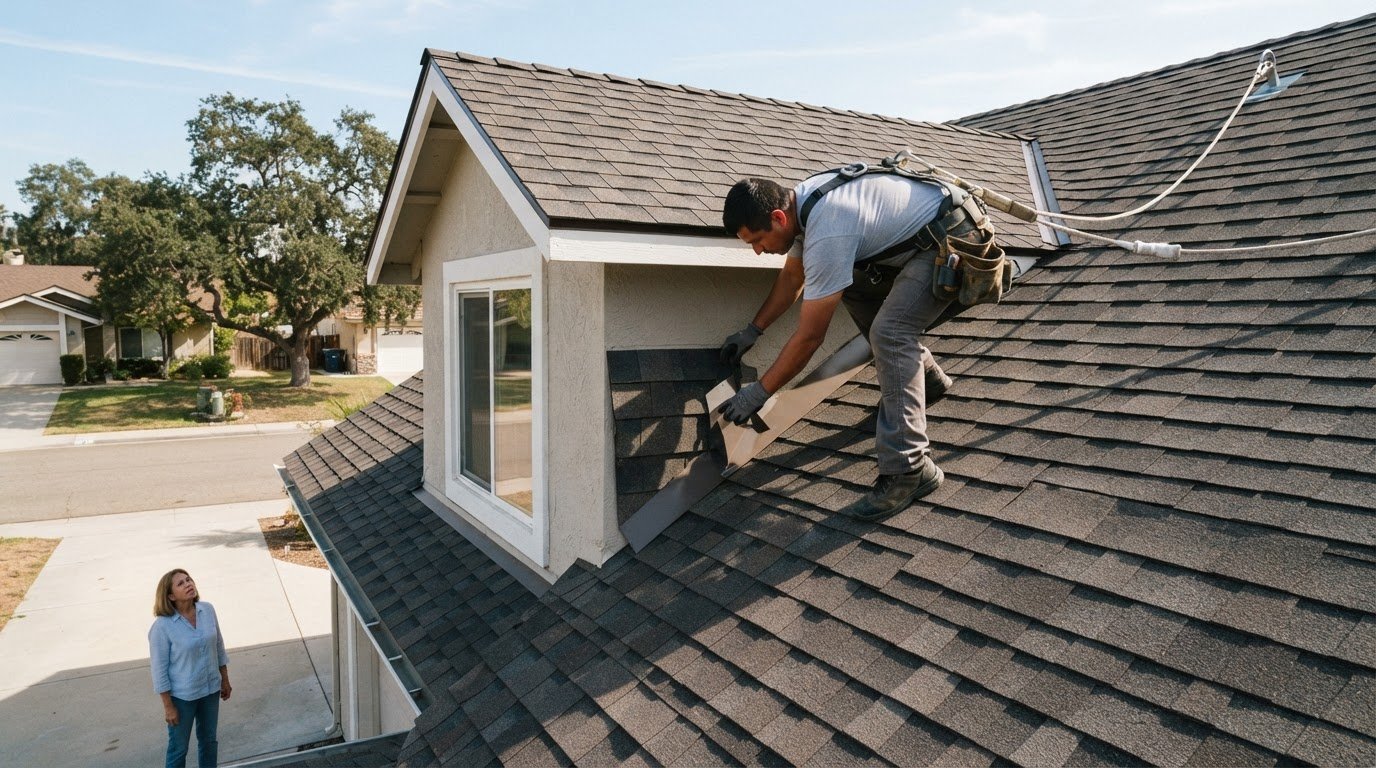
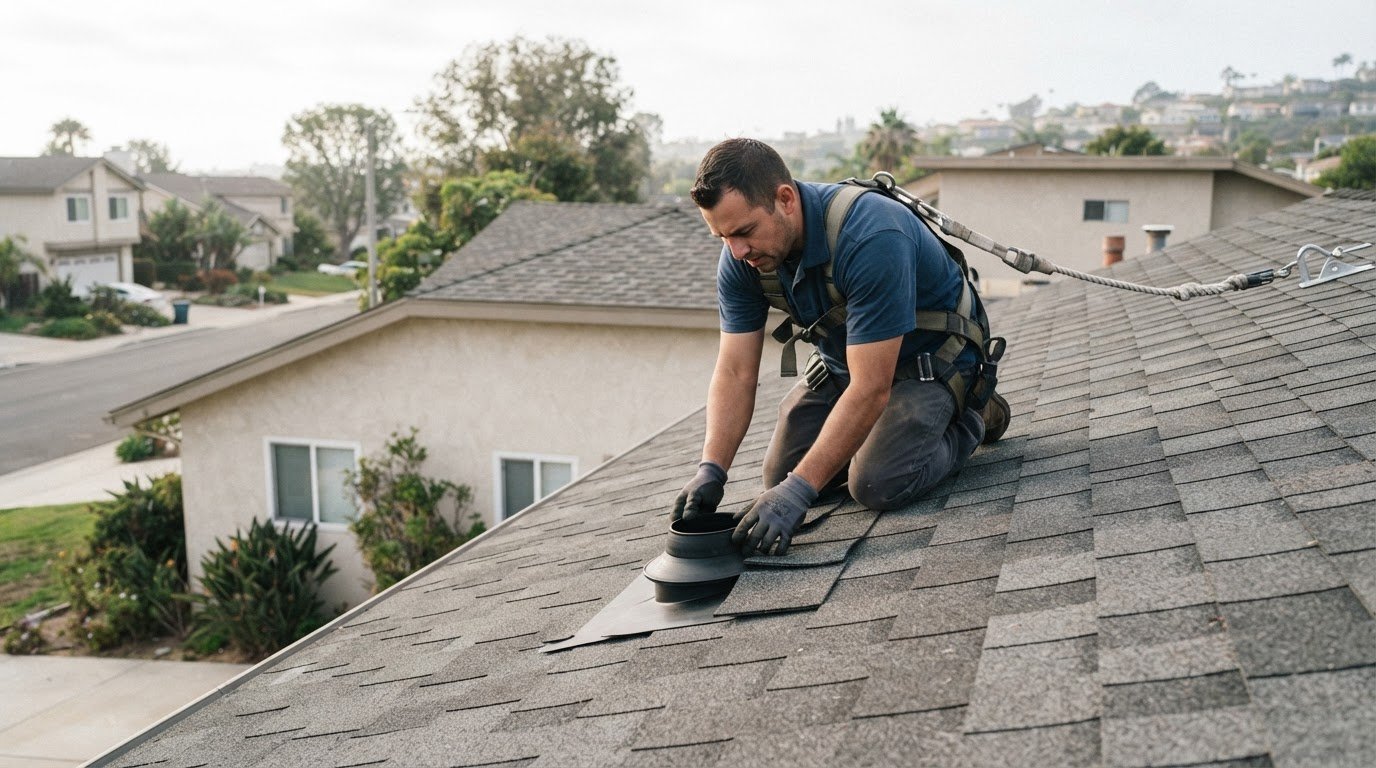
Include flashing in the installation plan. Flashing around chimneys, vents, and valleys may be replaced to help prevent water seepage. These details take careful fitting, so they contribute to the work involved beyond laying the main roofing material.
Account for ventilation work. Ridge vents are installed at the roof peak; exhaust or powered vents require their own placement within the roof system. The type of vent and roof layout affect the sequence. For an asphalt shingle roof, the estimate should identify the selected material and the installation scope.
Removing the existing roof and disposing of shingles
Understanding what to expect during the roof replacement process means knowing that tear-off exposes the roof deck before new materials go on. This stage clears away old layers and allows the crew to identify damage that needs attention.
Remove Old Shingles, Underlayment, and FlashingReview the tear-off plan to understand which existing layers the crew will remove. A full tear-off removes shingles, underlayment, and flashing down to the roof deck. Removing old flashing from chimneys, vents, and valleys clears the way for replacement components. The exposed surface also lets the crew assess whether the decking needs repair before installation continues.
Dispose of the Removed ShinglesMake room for the debris container before work starts. A dumpster may arrive 1-2 days before installation, giving the crew a place for old shingles, nails, and other materials. Cleanup can include hauling away roofing debris and using a magnetic sweep to find stray nails. Keep the driveway clear for disposal and site cleanup.
Review the roof deck before new layers go on. After the old roofing is removed, the crew can identify rot or other damage. Repairing damaged decking provides a solid foundation for the replacement system, which may include underlayment, flashing, ventilation components, and shingles. This inspection helps establish what work is needed beneath the visible roofing material.
Consider how the new shingles will be laid. Shingles are installed in courses, with careful attention to roof edges and valleys. Their staggered placement helps cover joints in the rows below. Flashing at valleys and around roof penetrations should fit closely with the roofing surface, as these transitions help manage water where roof sections meet.
Include roof performance in material planning. Cool-roof shingles can reduce the difference between attic and outside temperatures to 5-10 degrees. This option may affect the project budget and can be considered alongside color and appearance. Knowing what to expect during the roof replacement process also means planning for material choices before the crew begins installation.
Roof replacement costs and budget categories
A useful roof-replacement budget separates materials, labor, and work discovered after the old roofing comes off. Review each category in the estimate to understand what shapes the scope and where adjustments may arise. For community associations planning capital reserves for major structural repairs, professional services such as My Florida HOA Manager assist with long-term financial planning and budgeting.
Review the material options. Asphalt shingles, concrete tile, and other roofing materials differ in selection and installation requirements. An estimate can outline material, color, and warranty options, helping homeowners understand how the chosen finish affects the project. Cool-roof shingles may cost 10% to 50% more than other shingles, so include that choice in your budget discussion.
Understand the labor portion. Labor accounts for 25%-35% of roof replacement costs, while materials account for 55%-65%. These categories help explain how the project budget is distributed. Roof size, steep slopes, chimneys, skylights, and existing roofing layers affect the work involved in the roof installation process.
Include removal and disposal in the scope. Removing old shingles, underlayment, and flashing takes time and produces debris for disposal. A complete estimate should explain the tear-off and cleanup scope, rather than focusing only on the visible new roofing material. Ask how damaged decking discovered after removal will be addressed and documented.
Account for roof details and weather timing. Valleys, vents, and chimney flashing need careful installation alongside the main roofing. Rainy or snowy weather can affect when roofers work, so timing may shift. Keep schedule considerations distinct from listed cost categories, and review any scope changes before work proceeds.
Request a project-specific quote. The price depends on the case and is given after a quote request; key factors include roof dimensions, material selection, labor, removal needs, and repairs to damaged decking. A roofing contractor’s estimate gives homeowners a clearer basis for planning than a general industry average. To discuss your roof and its budget factors, request a roof replacement estimate.
Higher Levels Roofing: Roof Repair Services
Higher Levels Roofing provides roof repair services and helps homeowners plan replacements suited to their homes. If an inspection indicates that repair may be appropriate, the team can assess the roof’s needs. For replacement projects, options include asphalt shingles, flat concrete tile, concrete S tile, and clay tile.
Choose repair when the concern is limited and the existing roof remains serviceable; consider replacement when damage or wear affects broader areas. The right approach depends on the roof’s condition and the work needed to protect the structure. A clear assessment helps you understand the next step while keeping your home’s appearance and long-term needs in view.
Contact Higher Levels Roofing to discuss your roof repair or replacement needs.
Take the Next Step Toward a Roof That Fits Your Home
Knowing what to expect during the roof replacement process helps you make decisions that suit your home, priorities, and plans. The next step is to define a roof-specific scope, considering the material, appearance, and condition of the existing structure.
Higher Levels Roofing installs asphalt shingle, flat concrete tile, and concrete S tile roofing. Each option gives a home a distinct look, so consider which material best suits your preferences and property. A conversation about your roof can clarify the work involved and the choices available for your project.
For a careful assessment and guidance on your roofing needs, contact Higher Levels Roofing. You can move forward with a clearer plan and feel confident about taking the next step toward a well-prepared roof replacement.
Frequently Asked Questions
What happens if the crew finds additional damage during tear-off?
If tear-off reveals rot or other roof-deck damage, the affected decking needs repair or replacement before the new roofing is installed. This creates a sound base for the roof system. For example, damage around a leak may extend beyond the visible stain. Before proceeding, the crew can explain what was uncovered and how addressing it changes the scope of work.
Will my roof replacement be covered by insurance?
Coverage depends on your policy and the cause of the roof damage, so replacement isn’t automatically covered. Review your policy’s terms and contact your insurer to understand the claim process. Keep records of the roof’s condition, inspection findings, and estimates. If the insurer requests details about the work, these documents can clarify the proposed repairs or replacement.
Do companies that replace roofs work on the weekends?
Weekend scheduling varies, so it isn’t standard for every roof replacement. Discuss planned workdays while reviewing the project schedule. Also consider how installation may affect household routines, such as driveway access or time at home. A clear schedule helps you plan around the crew without assuming the work will happen on a particular day.
How Long Does a Roof Tear Off Take?
A tear-off for an average-sized roof can be completed in one day. The time depends on the roof’s size, the number of existing layers, and the complexity of its layout. A roof with multiple layers or several valleys, for example, involves more removal work than a simpler surface. The crew also removes old materials down to the roof deck.
What are the steps in a typical roof replacement process?
A typical replacement moves from inspection and estimate to material selection, scheduling, tear-off, deck preparation, and installation. The crew then completes cleanup and a final walkthrough. If tear-off reveals damaged decking, for example, repairs happen before new roofing covers the area. Each stage prepares the roof for the next and gives the finished system a properly prepared base.
How long does roof replacement take for an average home?
A residential roof replacement typically takes one to three days on site, while the full process, from inspection through final walkthrough, spans several weeks. Roof size, steep slopes, chimneys, skylights, multiple layers, and material all affect the installation schedule. Tile, for example, often takes longer to handle than asphalt shingles. Rain or snow can also affect when roofers work.
Comments